Who is Glyn Johns, the producer?

Johns is what some call a rock/pop producer who has worked with artists including Led Zeppelin, The Rolling Stones, the Beatles (Get Back Sessions), The Who, Eagles, Bob Dylan, Linda Ronstadt, Johnny Hallyday Steve Miller Band, Small Faces Spooky Tooth Midnight Oil New Model Army Belly Joe Satriani Gallagher and Lyle Georgie Fame Family Helen Watson Fairport Convention Buckacre.
In 1969, while working as a recording studio engineer at IBC Studios in London, Johns was called upon to rescue The Beatles’ troubled Get Back sessions.
He compiled several versions of the album that were all rejected by the band before handing it over to producer Phil Spector who created what we now know today as Let It Be.
Johns’s keen ear made his sound so famous that he was asked to produce the 1977 Eric Clapton album Slowhand, including the hit “Wonderful Tonight,” written by Clapton. He and Eric worked together again for the 2016 release I Still Do from legendary rocker himself, including hits such as Layla.
Approach to recording
Glyn Johns believes in going into a studio with zero overdubs which gives you two options: One, you make it work without overdubs, or Two, call it a day because there’s no way it will happen otherwise.
Overdubbing completely defeats the purpose of attempting to capture your sound from scratch. He does not believe in parts either, only playing from the start until the finish as if it were a gig.
What is the Glyn Jogns method of recording drums?

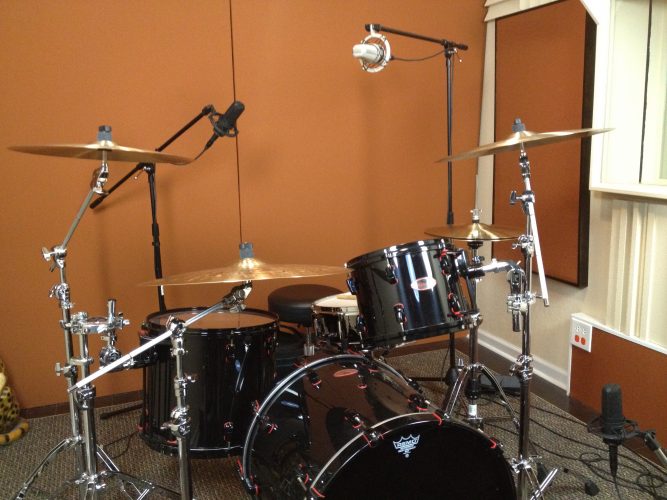
Glyn Johns developed a unique approach to the recording drums, often referred to as the “Glyn Johns Method.” This technique usually employs three or four microphones:
- one hoisted several feet overhead for natural perspective;
- one-off near the floor tom-tom;
- and another near bass drum
- additional mic on the snare
The key is to keep both side mic and overhead mic equally distance from the snare drum to form a triangular pattern with points being snare, side mic, and overhead.
This simple drum recording technique is great if you don’t have many mics at your disposal. Most of the sound comes from overheads, while close-mics can beef up kick and snare drum pieces!
Johns doesn’t like to close-mic each of his drums and only sometimes spots mics them when he needs more control over what comes through on tape.
Johns uses the ambient side mic to hear both the drums and kit as a whole. So while he’ll make subtle balance changes during the take, Johns rarely will move the overhead (or distant) mic.
After recording drums, Johns will listen back to each drum in isolation and make his final tweaks using EQ or compression.
How to do it step by step?

Step 1
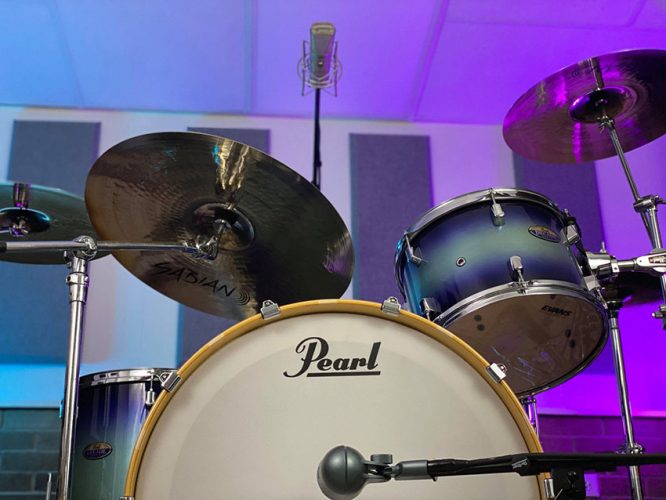
You start by placing the first overhead mic 40 to 60 inches directly above your snare drum. The best way is just pointing it straight down at the kit, capturing a complete and balanced image of everything you need to hear in that microphone.
Sometimes this means playing with the angle if cymbals are too harsh or adding more tom sound depending on what fits well tonally for specific songs. But, usually aim right outside one leg of each drum set-piece only slightly over center, so they’re all facing up towards the ceiling evenly.
Step 2
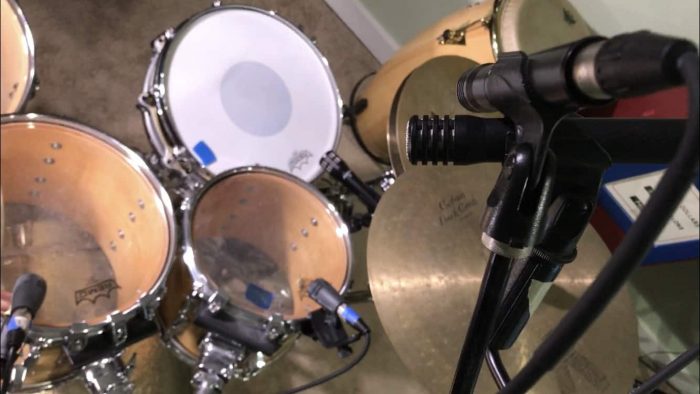
The second overhead is 6 inches above the floor tom, to its right. It’s facing straight across towards the snare drum and hi-hat – it’s perpendicular to your first mic.
Even though we call it an “overhead,” this microphone captures a fresh perspective of kit from below while still being slightly off-center on one side, so you get stereo imaging in post-production where needed.
Both overheads need to be precisely the same distance from the snare drum.
Step 3
A crucial aspect of this technique is the phase since it will result in a thin drum sound if you get them wrong. Nobody wants that!
Doing some simple math and geometry, we can determine that the distance from overhead 1 to snare is x. The second overhead must be y away for both sounds to come out at the same time when you hit play on your DAW (digital audio workstation).
If this isn’t possible because of where they are placed about each other or if using a cable would make things too complicated, another option is an L-Pad attenuator.
Step 4
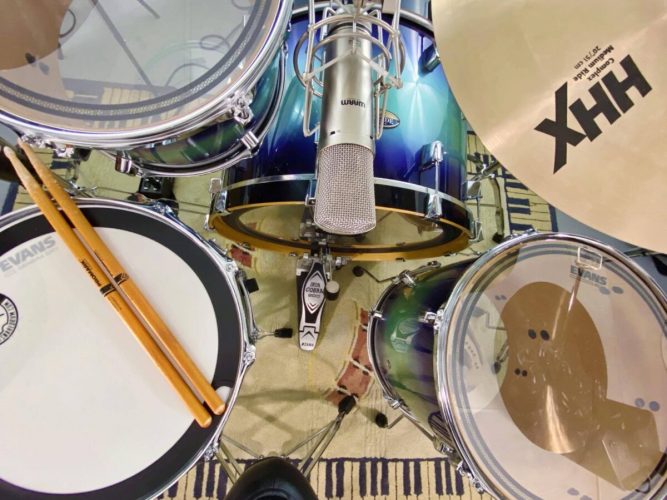
It’s essential to pick the perfect kick drum mic and place it suitable for a beefy low end. You can also muffle some of the boominess by adding a blanket or pillow inside your kick drum.
Step 5
Place your last snare mic. Similar to the kick spot mic, this one is a matter of personal preference.
Position your mic a couple of inches above your snare, angled down towards it and pointing at the center so that all sounds come in clearly from where they came from, creating a complete picture of sound with only two mics. Play around with both for whatever kind of sound you are going for!
How do you pan Glyn Johns?
To make the Glyn Johns method work perfectly, pan your kick and snare mics to center. Then take your overhead mic above the snare halfway on its right side for a good balance without taking it too far over there.
Otherwise, you will create an illusion of heavy sound coming from one direction when balanced evenly between all directions according to this process explained here.
Next, pan your other overhead mic to the far left. This gives the overall kit a depth and stereo image while also capturing more of that low-end rumble produced by your drummer’s kick drum pedal.
To achieve this, you can use tube microphones. Position one large-diaphragm microphone above each drum to create a rounded image with the snare at the center of it all.
This is perfect for softer rock or blues because it will sound open and natural while still being clear enough that every beat stands out regardless of volume level. However, an experienced drummer who uses great equipment is necessary, as well as high-quality mics.
Benefits and Drawbacks of Glyn Johns method?

The pros include a focus on the snare and pretty good phase coherence for the snare, with a negative being that one mic has much louder snares than those in other mics. You may also want to consider how this will affect the overall coverage of your kit as hyper-cardioid picks up less from surrounding drums.
The problem with this approach is that it fails to take certain things into account. For example, the drummer’s kit and how they position parts of their drum set can affect phasing problems when using this technique.
Often, you do not want your ride cymbal too close, or else it drowns out other sounds in your mix; at the same time, though, you don’t want them so far apart from each other either because then they will sound like two separate fills instead of one continuous pattern.
You also have to consider whether all three drums are going through different channels on both stereo speakers, which could result in phase cancellation between any specific pairings if positioned incorrectly, among many more factors.
Who should use this technique?
We would use the Glyn Johns Method to achieve an ambient but punchy drum sound with power when recording a vintage rock band. The technique could be quite effective for other genres if producing an ambient-type room tone is desired.
For example, indie music might benefit from this method depending on the situation and style of the band in question.
Mics to use for the Glyn Johns method
This technique involves three or four microphones – two overhead microphones, a kick mic, and sometimes an additional snare drum mic.
We suggest these mics:
Bass drum: AKG D112 or Audix D6
Snare drum: Shure SM57 as an all-purpose dynamic mic with good low-end response perfect when you need crisp consonants.
Overhead – Beyerdynamic M160 ribbons provide rich clarity while maintaining excellent detail through their sensitive mid-range frequencies, crucial for vocals.
Choosing overhead mics for Glyn Johns method
Here is a little buying guide of something you should pay attention to:
Wide frequency response
Large-diaphragm mics may have a frequency response that extends beyond the 20 Hz – 20,000 Hz audible range.
Accurate transient response
Transient information is the first thing that defines a sound. A microphone capsule accurately captures these transients and represents where they came from as best as possible, but so does its internal amplifier and output circuits!
Low self-noise
A low self-noise means the mic will be more sensitive to subtle changes in sound waves. It also has a better signal-to-noise ratio and a more fantastic dynamic range with a calm, friendly voice output tone.
High sensitivity
Condenser microphones are prized for their high sensitivity. Condensers get rid of background noise and pick up every sound with ease, so less preamp gain is needed to capture the sounds you want!
Versatility
A versatile solid-state condenser can have multiple switchable polar patterns, high pass filters, or passive attenuation devices.
Who did Glyn Johns produce?

Glyn Johns is an English record producer and engineer. He has worked with the Rolling Stones, The Who, Led Zeppelin, Eric Clapton, The Eagles, Steve Miller Band, The Clash, etc.
To produce bands like this, you must be very skilled in your work. You must know what each musician wants to sound like before making the final mixdown for public release. It is helpful if one person can do it all (from tracking to mixing).
As far as giving Glyn Johns proper credit, he first used this technique back in 1969 with the rolling stones “Honky Tonk Women.” Glyn Johns recorded few other tracks by the Rolling Stones using his unique style of recording.
This includes “Jumping Jack Flash” and many others.
Glyn Johns used his technique with well-known tracks; The Who’s “Live at Leeds,” Traffic’s “John Barleycorn Must Die,” Led Zeppelin II (1969), Sticky Fingers (1971), Eagles’ self-titled debut album, Joe Walsh’s 1975 solo album the Smoker You Drink, the Player You Get, and Steve Miller’s Fly Like an Eagle.
He also used this technique on KISS Alive 2’s drums sound, which may seem like it was recorded in a bathroom or tin can but was correctly done, although it seems like it isn’t.
It was mixed to give that raw unprofessional feel to imitate how it would sound if it weren’t mixed.
Glyn Johns explained his technique:
“I began by putting the drums in a small room, which would typically have been either a kitchen or a large bathroom. I had the idea of getting echo by putting tiles on the wall of these old Victorian houses.
How to avoid the significant fault of Glyn Johns method
The problem
In the typical Glyn Johns approach, the side mic is placed in line with the cymbal edge. As the edge of cymbal swings up and down over the side of the microphone it causes the microphone to pick up unevenl cymbal sound. When you mix that with a mic above, the sound gets more blended.
The solution
Put the side mic over the shoulder instead of over the floor tom. This will cause your body to block the sound of the hi-hat.
You will still be able to pick up the two-zone sound, but you will get out of the dangerous zone by placing the mic higher. The final result is a lot more even sound.
What are some other techniques that can be used in place of the Glyn Johns technique?
Single Microphone drum recording techniques

- One cardioid condenser microphone 6 feet above the floor is placed facing you.
- The mic is placed right over the drummer’s head to pick up sound evenly without picking up any ambient noise.
- This mic setup uses one cardioid condenser microphone as an overhead pointed down at the drums from a distance of about 4ft.
- This mic setup uses a condenser microphone with a cardioid or omni pattern placed 8 feet away and pointed at the drums. This will capture every detail of your performance, giving you unparalleled sound quality!
Dual Microphone drum recording technique
- Wide Stereo Overhead Mics – This microphone technique involves using two cardioid condenser microphones, one to three inches apart and pointed away from each other.
- Stereo X-Y is an easy way to get that perfect cymbal sound. Just position two condenser microphones about 3 feet above the drums, point them at a 90-degree angle from each other with just enough space between them, so they touch near their centers
- The head baffle technique is the most popular and oft-used mic placement for drums. This approach places two cardioid condenser microphones one to four inches from a drummer’s ear, pointed toward their face so that it captures all sound coming off of them consistently. The other mic can be placed anywhere on the top or behind where you want it but makes sure not too far away either as this will cause undesired proximity effect distortion, which is warm frequencies around 1kHz when these distances exceed about ten feet.
- One overhead and one in a kick. The cardioid condenser mic points downward at the drum kit, while a dynamic mike is placed inside your favorite metal-sounding drums, pointing towards where you want it to pick up sound from – about halfway between center head & shell!
- M/S stereo is a fun way to get the feel of recording in one room without having an extra mic. For example, if you have a guitar and singer sitting on opposite sides of your living space but want them, both heard clearly through headphones, when playback together, they’ll sound like there’s plenty more reverb than what was recorded! MS microphones exist, but they can also be done successfully with good quality cardioid mics or condensers equipped with figure 8 polar patterns.
Triple Microphone drum recording technique
- The kick, snare, and overhead technique – use one cardioid condenser microphone placed two feet above the cymbals and pointed down at your set. A second dynamic mic is then aimed at about 2 inches from another snare drum to get that full, rich sound of drums without any hushed parts or lost energy like what can happen when they’re far away from microphones capturing their essence correctly! The last step would be using 3 individual capsules inside each kick-drum membrane: 1 for picking up Low, precise frequencies (about 60Hz – 120dB.
- You may have heard the term X-Y and Kick used before, but what does it mean? For this technique, you need two cardioid condenser microphones in an XY configuration. Then use a dynamic kick drum mic, which sounds powerful without being too booming or overwhelming with volume!
Quadruple Microphone drum recording technique

- XY, Kick & Snare – This technique requires two condenser microphones placed in an XY configuration. One cardioid dynamic microphone pointed at the snare drum at a distance of about 2 inches above its head to pick up all sound waves from every angle while keeping everything balanced without too much noise interference from outside sounds getting through into your recording.
The best alternative to Glyn Johns technique
The Recorderman technique is a little-known and newer approach to recording drums that’s conceptually similar to the famous overhead configuration used by Glyn Johns.
It requires two Cardioid microphones: One mic must be 32 inches above center, pointing straight down from where it sits suspended over your snare drum, while another one should stand nearby, positioned around 2 feet back behind whatever surface they’re sitting on or standing against so no sound gets lost when playing through this setup!
This technique requires that the kick drum is equally distanced from both microphones.
This can be checked by taping one end of an arc to each mic, then pinching tightly for them all to stay put as you move around your kit while listening carefully – find where it sounds best!
The two tracks are panned L and R, although not necessarily 100%.
Recordeman overhead tracks can leave a hole in the middle if you’re listening from the center speaker or pair headphones for an additional effect! Recorderman is a great way to make your beats come alive.
The Recorderman technique is a great way to combat some problems plaguing home and project studios when recording drums.
It can be done in any sized room, even if it isn’t soundproofed well or has untrained drummers who bash their cymbals all over its surface- which means you will have plenty of ambient mics handy for adding depth where needed!