How hard is it to learn drums?
Drumming is a challenging skill to learn. It will take you 3 to 6 months to learn drum basics. But, for getting comfortable behind a drum set it will take you around 5 years.
By that time many people give up on drumming altogether, but there’s no reason why you should find it difficult if you follow some rules.
Some people believe that buying expensive drums makes them easier to play, while others say cheap is best when starting.
There isn’t much of an argument against buying cheap equipment at first, as long as it’s well made and playable. However, inexpensive drums have come with poor hardware design, which causes frustration for beginners.
In this article, we are going to talk about different drum techniques that professional drummers use.
Behind every extraordinary drummer you like, there is a substantial amount of work on these techniques.
Of course, you don’t need to master them all, but we suggest you utilize them in your playing to achieve a specific sound, speed, groove, and all other drumming elements.
Here are all the drum techniques we are going to discuss in this article:
- The Posture
- Different grips
- Basic strokes
- Wrist control
- Finger control
- Moeller stroke
- Foot technique
- Rudiments
- Drum fills
- Coordination
- Dynamic
- Staying relaxed
- Counting out loud
Before we dive into techniques, let’s talk about sitting behind the drum kit.
The posture
Almost all drummers suffer from back problems. As a young drummer, you don’t think about it, but as time goes by, you get fearful because a back injury can move you away from playing the drums.
If you are a beginner drummer, why not do it the right way and avoid risks.
The correct posture implements relaxed shoulders where your trapezius muscle is completely relaxed. Also, the more you bend during playing, the more pressure you put on, the lower part of the back.
Sit behind the drum kit at 90 degree angle, put your hands beside you and make sure your shoulders are down.
Now raise the forearm and put drumsticks into your hands. Ok, you are ready to start. Let’s move on…
Different grips
Now, when you know how to sit properly, it’s time to learn how to hold the drum sticks properly.
It’s time to choose the proper grip:
- Matched (German and American)
- French
- Traditional
Professional drummers mix all these grips but to start, use one while you practice others.
Matched (German and American)
German grip 
American grip
Matched grip has two variations: German and American grip.
German grip
The fulcrum is either between a thumb and the index finger or a thumb and the middle finger. Next, take the stick, make sure everything is relaxed and the drumstick has enough space.
Now, try to find the balance point – part of the stick where it bounces the most. Palms need to face down, and you should be able to see the bottom of the stick.
American grip
American grip is a changed version of the German grip. Drummers who propagate this grip suggest that your fulcrum should be between a thumb and the middle finger while the index finger serves for support and stick coordination. The remaining fingers hold the stick with cheekbones.
The main difference, however, is in the wrist position. Instead of facing down, palms face each other, just a little more than in German grip. Also, the bottom of the stick is in the center of the palm rather than peeking from the side.
French grip
The French grip is known as the main grip for finger control. Drummers mostly use this grip to get to a specific tempo that other grips or wrist can’t achieve.
In French grip, the fulcrum is between the thumb and the index finger. Thus, palms are fully facing each other, and thumbs are placed on top of the drumsticks.
Traditional grip
Traditional grip is also known as orthodox or underhand grip. It is widely used in jazz music. It’s the only grip where hands are not matched. The right hand uses a German or American grip, while the grip in the left hand is different.
Here is how to properly hold the stick in the traditional grip. First, face your palm inwards and put the drumstick between your palm; the index finger goes between the middle and a ring finger.
This kind of grip allows a drumstick to hit the drum at a different angle than in matched, which causes a different sound, the more refined, which is precisely why drummers use this grip for grooves with a lot of ghost notes.
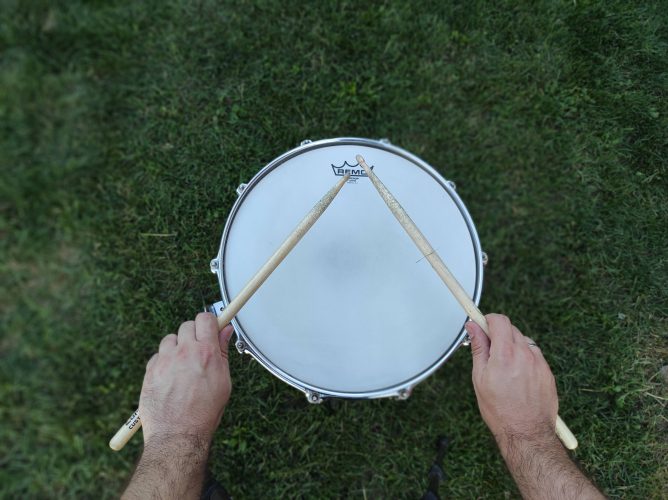
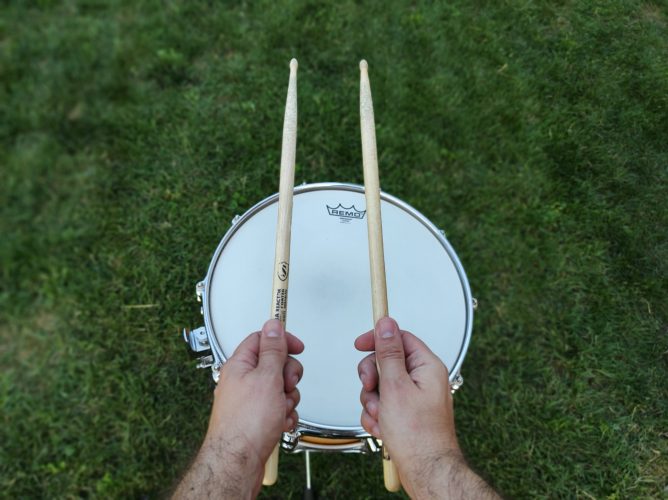
Basic strokes
Although it’s boring as hell to practice this, please have patience. It will pay off for you, we promise. It’s an essential exercise to develop your wrist technique and dynamic.
There are four basic strokes, and each stroke consists of two drumstick positions, a starting and an ending, and only one note.
- Downstroke
- Tap stroke
- Upstroke
- Full stroke
Downstroke
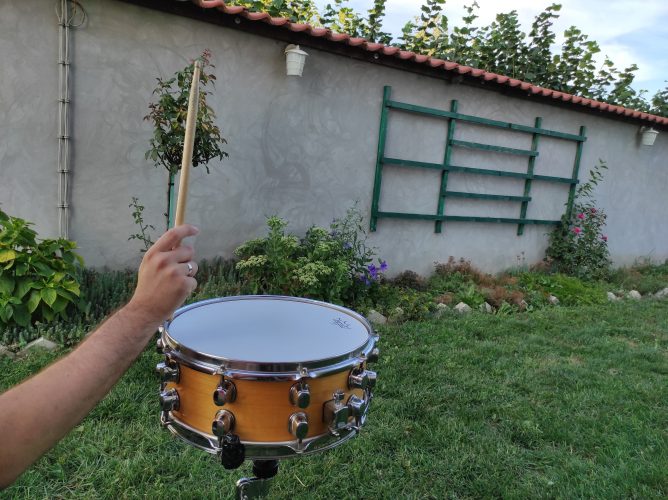
Starting position 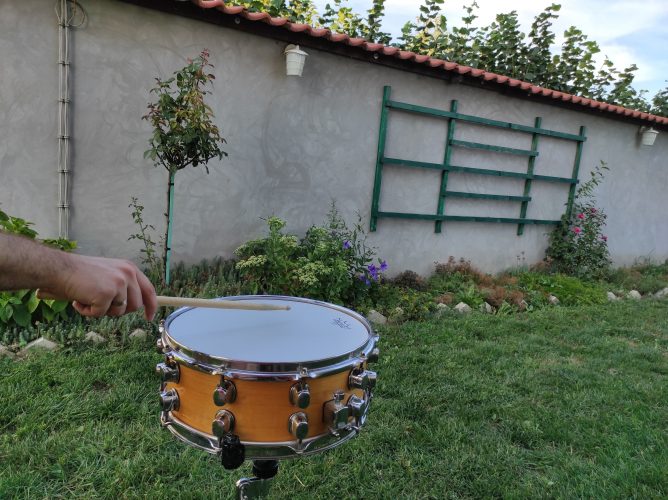
Ending positon
In the starting position the drumstick stands vertical. So you need to hit a drum and leave the stick an inch away from it. Pay attention to stick height after you hit a drum.
Tap stroke
It’s effortless. You stay in the ending position of the downstroke, so the inch away from the drum, and while you’re there, you need to hit the drum as quietly as you can.
Upstroke
Starting position Ending position
After a tap, please do the same quiet hit but raise the drumstick in the starting position of a downstroke, all the way up, so it stands vertical.
Full stroke
Now, while your stick stands vertical, hit the drum and put it back in the same position.
Ok, this is the full circle splitted into separate steps. Try to connect them all and speed up after some time, but tap and upstrokes stay quiet.
Wrist control
You generally have more control with the wrist than with your fingers, so the wrist is more used for stick control than fingers, especially in slow tempos.
The essential and challenging part is staying relaxed. If you want to master wrist control, we suggest implementing four basic strokes into your playing and practice moving around the set.
Leave fingers for later, and try not to use them so you can get complete wrist control.
With the wrist, you get a controlled stroke, while with fingers, it’s more of a rebound stroke.
Finger control
Remember that your fingers and hands can be conditioned for speed just like the rest of your body. Like with upstrokes, you need good coordination between the two hands to develop speed. Therefore, staying relaxed is a necessity and helps keep control while playing at high speeds.
Practice finger control while you are in French stroke. Try bouncing the stick with a thumb and the index finger, and then add one finger at a time.
Then, try bouncing the drumstick with the thumb and index finger, then with the thumb and middle finger, and so on.
When you get comfortable, try practicing coordination. Speed will come eventually after your hands get coordinated.
Moeller stroke
Moeller technique came from a need to get hands more relaxed by getting several strokes out of only one movement.
The man who initially developed this technique was a man by the name of Stanford Moeller.
Moeller developed the system by observing army veterans who played in a certain way naturally. So, he took this approach and developed a learning system. Many of his students adopted it and referred to it as Moeller’s technique.
One of his students was legendary Jim Chapin, who later taught guys like Dom Famularo, Dave Weckl, etc.
That’s how this technique was brought into the drumming community. The whole technique relies on the whipping motion you need to implement into your playing.
Here’s Jojo Mayer showing how it’s done:
It’s safe to say we covered pretty much everything in terms of hand technique, so let’s switch to a foot technique and see how it’s done
Bass drum techniques
Several bass drum techniques are popular nowadays:
- Bury the beater
- Come off
- Heel down technique
- Heel up technique
- Heel-Toe
- Swivel technique
- The slide
All the bass drum techniques are based upon foot motion rather than moving the entire leg, or if you are moving the whole leg, you might as well get several hits.
Bury the beater

This technique doesn’t imply the foot movement but the place where the beater ends after a hit, and that is on the drum head. This way, you get a shorter tone with more attack.
Come off

If you want to get a more comprehensive sound with less attack after hitting a bass drum, take the beater off the drum head. This way, you will get a longer sustain and a bigger sound.
Heel down technique

In this foot technique, the heel is down at all times. Be careful with this technique because it can hurt your foot muscles if you push it too far.
Heel up technique
It’s opposite from the heel down technique. The heel is always up in the air, and all hits are performed by foot. So it looks pretty much like dancing on the pedals.
Heel-Toe
The heel-toe bass technique implements that you first hit the drum with your entire foot and then with your toes. This kick drum technique is very similar to hand motion in the Moeller method.
Check out the demonstration:
Swivel technique
This bass drum technique relies on the ankle motion from side to side. Therefore, your heel should be up in the air at all times. Metal drummers often use this technique because it is designed to target speed rather than strength.
Here is how to do it:
The slide
It’s one of the most popular foot techniques. It has two versions, let’s name them Jojo Mayer’s version and Benny Greb’s version. Check out how they do it and see which version is better for you.
Whether you plan to implement some of these bass drum techniques into your playing, we suggest you practice and develop them because they will develop your foot muscles in charge of coordination and foot movement.
Rudiments
Rudiments are the basic foundation of drumming, and therefore they should be practiced daily. Of course, we can practice them without drums, but we recommend practicing them on a drum set to get used to orchestration (playing rudiments around the drum set).
They can be performed on a drum pad, snare drum, or around the drum set.
Basic rudiments are:
- Single stroke rolls – R L R L
- Double stroke rolls – R R L L
- Triple stroke rolls – R L R L R L
- Paradiddles – R L R R L R L L
- Flams – two strokes, one little before other
- Five, seven, nine-stroke rolls
Each of these rudiments has multiple variations, plus there are a lot more rudiments.
Also, besides different variations, each of these rudiments could have accented notes, flam accents, unaccented notes, or even pauses.
We suggest you start with single strokes as an exercise for both hands and multiple bounce rolls to develop only one hand.
For instance, you could practice a nine stroke roll with only one hand.
Drum fills
Let’s talk about licks, fills chops, or however you want to call them—an unseparated part of drumming but not as essential as steady timing, dynamic, and groove.
So, please don’t dive into fills before you dive into all of these crucial things. Steve Gad once said, “Fills bring the thrills, but groove pays the bills.”
Take this seriously and make sure your “one” is safe and sound before you start chopping the drums.
Ensure you first develop a sense of time, coordination and dynamic.
We suggest learning the systems either from drum books, online lessons, or YouTube videos rather than learning lick per lick.
Let us explain.
Have you heard about linear drumming?
Linear drumming implies the use of one limb at the time. Therefore, there are no two notes played at the same time.
The most common patterns are:
R L F
L R F
F R L
F L R
R F L
L F R
R L F F
F F R L
R L R L F F
F F R L R L
- R= right hand
- L= left hand
- F= foot
If you get comfortable with linear drumming as a system, you can use it to develop many fills.
This approach is more beneficial. So, whenever you hear some excellent fill, we suggest you dig more and try to figure out the system behind this lick.
Coordination
Maybe the most challenging part of all drum techniques is the coordination. By coordination, we refer to playing complex polyrhythms and separating your limbs.
Here is an excellent example of independence by Virgil Donati:
As you see, drums can get very complex. We suggest you start with more simple exercises.
One of the best books to develop independence is 4-Way Coordination by Marvin Dahlgren.
This book contains a step by step guide to developing your independence.
Also, another part of drum coordination is moving around the kit, also known as fluidity.
Here is one fantastic exercise to develop fluidity:
Dynamic
You should think about the dynamic at all times. Dynamic makes drumming musical; without it, it’s just noise.
Dynamic in a song is a difference in the volume of verse and a chorus, but the dynamic in drumming is the volume difference between notes.
Ghost notes are harder to play and control, but you should use them to your advantage. If you play soft, then it’s easy to play an accent.
Using ghost notes and controlling the accents will make a substantial difference in your drum sound.
To extract the best sound of a drum you need to hit the center. While doing that your hand needs to be completely relaxed.
Check out this video of Thomas Lang where he talks about the importance of dynamic range in drumming:
Staying relaxed
An essential part of drumming is staying relaxed at all times. If you get stiff, your sound changes, you get cramps, your speed suffers, and at the end, your body suffers.
When you come to the complex part, which is hard for you to play, that’s the moment when muscles get stiff.
The only solution is to improve technique. The idea is getting more with less effort.
Also learn more rudiments, it will be easier for your brain to recall the information rather than stepping into the unknown.
If you know what you will play before you play it, your brain will not freeze, and your muscles will not get stiff.
Counting out loud
It’s a part of the coordination and developing your inner sense of time. For example, you might hear drummers talk about knowing where the “One” is.
All the chops in the world are useless if you lose the “One.” Counting loud will teach you to feel the “One” and to develop your sense of time.
It will also make your grooves steady and your playing more accurate.
We suggest you check out this video of Benny Greb, where he talks about the importance of counting out loud.
Stretching
Before sitting behind a drum set, make sure you stretch your muscles just like you will play sports. It will keep you flexible and loose.
As a drummer, you use every muscle in your body. Therefore, it is essential to be flexible.
Flexibility also helps with endurance. You can play longer without getting tired if your muscles are looser than usual, as they should be after stretching.
Faster hands
The eternal question for most drummers is how to get faster hands?
First things first. Make sure you have a solid grip. This is most important for speed and endurance. Your hands should be perfectly relaxed while holding the drumsticks, not weak or too tight.
Stretching exercises will help you with this as well. Many of the legendary drummers state that hand speed is all about control.
It’s easier to gain control by using the wrist, and when the tempo is too fast, you should use your fingers.
It would be best if you first practice slowly, to make sure you have complete control over your body in terms of stick control, relaxation, breathing, and endurance.
1st approach
Some drummers like Dennis Chambers suggest practicing on pillows to improve your hand speed. It’s because pillows don’t have a rebound, so your muscles need to work more.
2nd approach
Others suggest you should practice with heavier sticks than the one you are playing regularly.
3rd approach
The third option is to always practice on a surface with a rebound to learn to control the drumsticks.
We suggest you try all three and see which one is good for you.
Here are Mike Johnston’s tips for faster hand speed.
How Long Should I Practice Every Day?
There is no general rule, but the good rule of thumb is to focus your exercise on quality rather than quantity.
Meaning, it’s better to practice 1 hour a day but slow with a clear goal than to play chops for 5 hours.
Your practice routine should have an exact goal in mind. Whether it’s coordination, technique, endurance, or time it doesn’t matter as long, you have a clear intention behind every hour of practice.
How to practice drums without drums?
You can use pillows, a drum pad, or any playing surface. Thus, you can practice various things without actually sitting behind a drum kit.
On a single drum pad, you can practice:
- rudiments
- time
- wrist control
- finger control
- rebound
- hand speed
- Dynamic
Also, you don’t need a pedal to practice your foot technique. All the techniques mentioned above can be done without a drum pedal.
Go check out a video with Tomas Lang about the foot technique we posted above.
Drum notation
Reading drum notation is a challenge for most of us. Although sight reading is very common in drum education, many drummers worldwide don’t read notes.
Some drummers built careers without knowing how to read notes or at least not being comfortable with fast sight reading.
That says it all. It’s good to know but not essential to succeed.
If you decide to learn to read drum sheets, cool. It will be easy for you to learn new things using drum books.
We suggest you start with The Drummer’s Link to Sight Reading book.
If not, that’s cool too, because like we said, it is not essential.
Is it hard to learn drum notation?
No, you will be able to master basic drum beats and fundamental sight reading in a few weeks, but for sight reading complex rhythms or drum solos, you need to spend more time.
It is easier if you already know how to write music, but it will take some time because drum notation has different symbols not used in a standard written piece.
Final thoughts
We hope this article will help you in developing a drum technique and mastering drumming in general.
It’s just the tip of an iceberg in terms of information that you will gather by exploring drumming.
Don’t take your talent for granted and for the ones with lack of talent we say 99% is hard work.
Keep pushing and building your knowledge base by listening to music and building your drum technique.