BY JAKE WOOD | FROM THE OCTOBER 2012 ISSUE OF DRUM!
Hi, my name is Jake, and I’m a recovering mike-aholic. Back when I was a junkie I’d do anything to get my next mix. I was fading fast, isolating my loved ones, all to stop the bleed. Every quarter-inch went to more microphones, and I was one Neumann away from becoming homeless, hanging by an XLR. Thankfully, I eventually saw the sine, and ever since I’ve had a clean track of one to four microphones per session. I’ll never forget my past, and for that, everyday still Hertz. So, here’s what you need to know on how to record drums.
THE ALTERNATIVE APPROACH
While standard professional drum-recording scenarios involve at least eight or nine microphones, history has colorfully proven that quite the contrary can also be just as kosher. It is in fact very possible to get great-sounding drum tracks with only a few choice microphones.
Minimalism wasn’t an edgy alternative back in the 1960’s when the art of recording drums began to take shape—it was the norm. With the four-track recorder as the standard medium of the time, it limited engineers to very few microphones on the drums. Artists like The Beatles, Led Zeppelin, The Dave Brubeck Quartet, and John Coltrane typically used one to four microphones on a kit, depending on the album and the year it was made.
Eddie Kramer, for instance, the engineer on Jimi Hendrix’s Are You Experienced (and the engineer for many other ground-breaking albums), was forced to track Mitch Mitchell’s monumental drum performances in mono!
Another song of the time that was captured with a minimalist technique, Led Zeppelin’s “When The Levee Breaks,” contains one of the single most significant and easily identifiable drum mixes in history, yet it was tracked with only two microphones. The engineer on that track, Andy Johns, brother of Engineer Glyn Johns, is greatly responsible for this definitive Bonham sound.
While in a large house, Johns recorded Bonham with two M160 double-ribbon microphones placed approximately halfway up a stairwell in the foyer, compressed to all hell, and affected with a Binson Echorec delay. According to Johns, it was the first time Bonham was actually happy with the drum tones (and rightfully so.
They sound huge!). And yet as epic as that drum mix is, do the drums sound perfect? Would that tone work for just any song? Not a chance. The track is muddied with grit; it’s fairly monophonic; and of course, he’s John Bonham and you aren’t.
Make no mistake—minimalist drum recording setups are not the answer for every situation. As rich as they can sound, their natural yet lively chaotic ambience simply won’t work for every song or band. Additionally, trying to replicate certain drum sounds from favorite recordings, like a Metallica album, for instance, won’t work, as they were crafted from many close mikes and samples. That said, here are some suggested steps, setups, and treatments to make the most out of a minimalist recording setup.
https://drummagazine.com/how-to-prepare-your-drum-set-for-the-recording-studio-2/
REAL ESTATE
Prior to plugging anything in, the most important thing to do first is figure out where in the room the drums sound best. While the idea of moving drums around isn’t a holiday for most, enjoying the subtle differences of playing in various areas of a room can really affect a performance, and will certainly affect how the drums sound.
To maximize the “open” sound (assuming the ceiling is angled), place the drums under the tallest point for the most reverb. Just remember that every room has a character of its own, and different locations will greatly change the gestalt of the drums, particularly the kick and toms.
MAKE A NEW PLAN, STAN
Having an artistic plan instead of a “let’s see what comes out in the wash” attitude is a smarter approach that will save time in the mixing room. Surprisingly, many engineers, both amateur and professional, don’t always have a planned outcome.
San Francisco mastering engineer Michael Romanowski (Dredg, Badfinger, Super Adventure Club), a regular practitioner of minimalist drum miking, is always amazed at how people will plug in a lot of microphones and not know what they are going for, noting that “paying attention from the start makes mixing super easy and with little to no fixes.
A lot of people just throw mikes up and say, ‘We’ll fix it in the mix.’” Well, why bother repairing if it’s possible to get it right from the downbeat? The following approaches have differing results, and hopefully their descriptions, along with experimentation, will galvanize and expedite your next recording session.
ONE MIKE? DONE
Starting with the simplest setup possible, it doesn’t get much easier than a one-mike operation. Although sonically limiting and leaving a little something to be desired, the one-mike strategy can be just what the doctor ordered, if given the right drummer and the right song.
Ribbon and condenser microphones are the best candidates for the leading role in this one-mike show, with condensers typically being more sensitive to higher frequencies (this can be both good and bad, as they are brighter, but can also be on the brittle side).
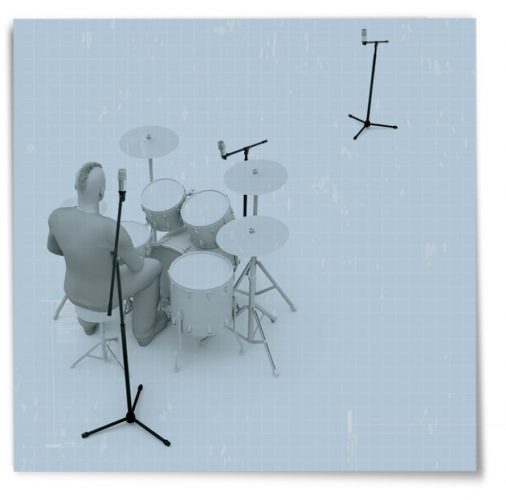
Any one of these microphone placements would work for a one-mike drum recording setup.
The three best locations for this rather important piece are as a room mike, a drummer’s perspective mike, and a front-of-kit mike. The room position (a minimum of 10′ from the kit) has the most ambience and sounds farthest away. The front-of-kit (approximately 2′ back from the kick and 4′ up), meanwhile, is the punchiest.
But the drummer’s-perspective position might just be the most realistic. This author’s personal favorite is the front-of-kit position because it captures everything, especially a strong kick (much stronger than the drummer’s perspective).
Also keep in mind that the one-mike method is married to a certain natural, harmonically chaotic vibe. Because this isn’t a pristine controlled recording situation (it’s the exact opposite of the close-miked Steely Dan tones), it’s only recommended for folks that can go with the flow and embrace the dirt.
TWO TIMING
Because most entry-level audio interfaces come with only two XLR inputs, learning to milk two mikes is a very valuable money saving skill. A second mike with its own separate track can add just enough sonic control to season a mix and bring out some real flavor.
The two main positioning strategies to maximizing auditory potential are either with both microphones in distant placement, or with one as a distant mike and the other as a close mike.
Both can sound great, but there’s an interesting balance of power between the two methods. With two distant mikes, it’s possible to get more of a stereo image of the kit. With one distant and one close mike, stereo imaging is stymied, but there’s more control over the tone of a specific drum. Here are two excellent means to recording with only a pair of microphones.
FRONT-OF-KIT AND SNARE MIKE
The front-of-kit mike (again, about 2′ back from the kick and 4′ high) is like the Swiss Army knife of mike placement (minus the worthless toothpick). With a large-diaphragm condenser at the helm, it pretty much has every drum covered. The drums sound active and lively, and even the kick comes in surprisingly nice and strong.
That said, sometimes there’s a little meat missing from the snare. With the addition of a dynamic mike (Shure’s SM57 is the standard, placed approximately 1″ away from the head and rim, pointed at the center of the snare), it’s possible to fatten up and focus in on a “closer” snare tone. The major downsides to this format are that the cymbals can easily overwhelm the front-of-kit mike (which is 85 percent of the mix), and stereo imaging is limited and awkward.
The two best steps to avoiding cymbal overload are to simply play the cymbals quieter and to use the less bright-sounding ribbon mike instead of a condenser. Check out “Steve Zissou’s Underwater Party,” a two-mike production, with an Audio-Technica 4033a condenser at the front of kit and an SM57 on the snare:
DRUMMER’S PERSPECTIVE AND BASS DRUM
The drummer’s perspective mike (placed relatively close to the drummer’s head, but not so close as to catch any teased hair head-banging) sounds very similar to the front-of-kit position, except that there’s a little more of the high-end stick attack and a lot less bass drum.
The kick mike, placed about halfway inside the drum (for instance Shure’s Beta 52A or AKG’s D 112), and pointing a little off center, is added as a precautionary inoculation of an extra chest-thumping 50Hz boost and a 2–5kHz clicking attack.
THREE’S COMPANY—SO WHO INVITED FOUR AND FIVE?
While options increase greatly as more mikes become involved, the basic concepts of distant and close mikes still work for most setups involving anywhere from three to five microphones. If budget and time allow, these variations can really lead to outstandingly large and live results. Here are but a few of the many variations that can be implemented.
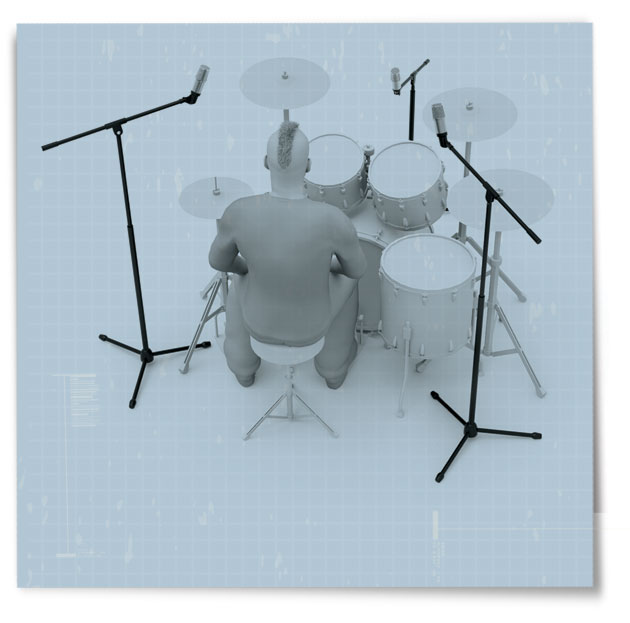
If you have three microphones, this triangle approach can give a balanced, full sound to your drum recording.
180 DEGREES (How To Record Drums)
A common practice with 1960’s and ’70s rock and jazz is the three-microphone triangular approach. While stubborn opinions abound on what’s the best way to configure the traditional triumvirate, the basic format is a front-of-kit mike, a hi-hat side overhead, and a floor tom overhead (somewhat near the drummer’s right shoulder).
The distances of all of these mikes from the kit is directly proportional to how close and open the drums sound, and with no close mikes to reign it back in, it’s important to evaluate an appropriate balance. The height of the overheads (anywhere from 30″ to 60″ from the snare) should be positioned with consideration to the height of the ceiling, the distance between drums and cymbals, and the drummer’s sensitivity to dynamics.
Because there are two overheads involved, phase cancellation becomes a serious concern. Break out the measuring tape and adjust the overheads so they are equidistant from the snare. Note, however, this method only prevents the snare from being out of phase, and any other drum or cymbal may still be somewhat phase-y.
To counteract this, some engineers prefer to measure from the imaginary “center” of the kit. Unlike the previous setups, the two overheads allow for a beautiful panning job, making the drums sound cohesively wide. Not surprisingly, someone in the microphone business finally took note and made a mike kit just for the triple-threat vintage approach.
Blue Microphone’s “Pro Drum Kit Kit” is a three-piece suit, tailored with two cardioid-condenser Dragonflys and one large-diaphragm-condenser Mouse to capture phenomenally realistic reproductions of all elements of the kit, from the sparkling highs and warm mids to the thumping lows and sharp attack normally delegated to a kick mike.
Similarly, Earthworks has a three-piece mike set (it’s actually just three SR25 cardioid condensers) with two overheads and one kick.
The other popular minimalist strategy, sometimes referred to as the “Glyn Johns technique,” involves a mixture of four to five distant and close mikes. With two overheads, one near the hi-hat, the other near the floor tom and right shoulder, a kick, a snare, and occasionally a room mike, the arsenal is more than enough to capture well-rounded drum tones that don’t suffer from being too roomy or too controlled.
A few other basic starting blocks for various scenarios are to have the overheads in XY position (angled at 90-degrees from each other), two drummer’s perspective mikes (one near each shoulder, using the head as a baffle, and from here on out referred to as “double parrot”), or to have a stereo pair as room mikes. All have a character of their own, and experimentation is the best way to learn about them.
A NOTE ABOUT OVERHEADS
If the ceiling is low, it’s best to work with cardioid condensers, as ribbons by nature work as figure-8 pickup patterns and will catch a lot of unwanted reflections from the ceiling. If the ceiling is more than 8′ tall, try out some omni mikes. And if the drummer is tracking with the band in the same room, switch them out with hypercardioid condensers for the most isolation possible.
DRUMMING STRATEGIES
Getting a good drum mix isn’t only up to the engineer, as the drummer plays an even more critical role. The fewer microphones used, the more responsibility gets placed on a solid, balanced drum take. It’s harder to polish an erratic and disjointed performance with studio magic—wimpy snare cracks and pussyfooting tom rolls combined with overbearing trashy cymbals can be the death of the backbeat, and a minimalist setup can’t resuscitate that kind of issue.
Sensitivity and awareness are key, and drummers that learn to mix by playing have plenty more work in their future, so set up some mikes, mix from the sticks, and give the faders a rest.